
Unit Testing for Data Engineering: How to Ensure Production-Ready Data Pipelines

The Business Problem: Ensuring Trustworthy Data in Production Environments
Introduction
What is Unit Testing?
Unit Testing in Python and PySpark
Converting Databricks Notebooks into Python Modules
Making Modules Importable in the Repository
Setting Up a Virtual Environment for Pytest
Organizing Test Files
Writing Pytest Cases
Pytest commands
Pytest fixtures
About patching
Handling dbutils in Python Modules
Using Spark for Testing via Databricks Connect
Setting Up a Pytest Fixture for Spark Connection
Authentication in CI/CD
Adding Unit Tests to CI/CD
Checking for Missing Unit Tests in CI
Using pytest-cv for Coverage Analysis
Steps Taken to Integrate Test Coverage in CI
Conclusion
The Business Problem: Ensuring Trustworthy Data in Production Environments
In today’s data-driven world, the success of any business use case relies heavily on trust in the data. This trust is built upon key pillars such as data accuracy, consistency, freshness, and overall quality. When organizations release data into production, data teams need to be 100% confident that the data is truly production-ready. Achieving this high level of confidence involves multiple factors, including rigorous data quality checks, validation of ingestion processes, and ensuring the correctness of transformation and aggregation logic.
One of the most effective ways to validate the correctness of code logic is through unit testing. By testing individual code modules in isolation, unit testing helps ensure that each component functions as expected, contributing to the overall reliability of the data pipeline. At our organization, we strive to achieve this assurance through end-to-end testing of data pipelines, with unit testing playing a critical role in delivering the due diligence needed for robust data systems.
This article aims to address this business challenge by providing a step-by-step guide on implementing unit testing in data engineering projects using Python and PySpark. I will also demonstrate how to automate this process using GitHub CI workflows, enforcing a culture of code quality where developers cannot push to a development branch unless the code passes all unit tests. By incorporating these practices, data teams can enhance the reliability of their data pipelines and build a solid foundation for data-driven decision-making within their organizations.
Introduction
Unit testing is an essential practice in software development, ensuring that individual components of your codebase function as expected. In the realm of data engineering, particularly with Python and PySpark, robust unit testing becomes even more critical as data pipelines often serve as the backbone of data-driven applications. In this post, I will guide you through implementing unit tests specifically for data ingestion modules, converting Databricks notebooks into importable Python modules, and setting up a seamless CI/CD (Continuous Integration/Continuous Deployment) workflow using GitHub. We’ll cover everything from setting up a virtual environment and organizing test files to leveraging Pytest for testing and integrating coverage analysis in CI. Whether you’re looking to enhance the reliability of your data engineering projects or streamline your testing workflow, this comprehensive guide has you covered.
What is Unit Testing?
Unit testing is a software development practice that involves writing small, isolated tests to verify the correctness of individual components or functions in a codebase. These tests ensure that each unit of code behaves as expected, helping to catch bugs early in the development cycle. By automating these tests, developers can confidently refactor code, maintain stability, and improve code quality over time. Unit tests are typically fast, deterministic, and focused on a single functionality, making them a crucial part of test-driven development (TDD) and continuous integration (CI) workflows.
Unit Testing in Python and PySpark
In Python, unit testing is commonly performed using the built-in unittest framework, as well as third-party libraries like pytest for more concise and flexible test writing. Both unittest and pytest are popular frameworks for unit testing in Python, but they differ in usability, features, and flexibility. Here’s a comparison:
1. Ease of Use & Syntax
unittest: Inspired by Java’s JUnit, it follows an object-oriented approach, requiring test cases to be written as classes that inherit from
unittest.TestCase.Test methods must be prefixed withtest_, and assertions use methods likeself.assertEqual(), self.assertTrue(), etc.pytest: More concise and Pythonic, it allows writing tests as simple functions without requiring class-based structures. Assertions use Python’s built-in
assertstatement, making tests easier to read and write.
2. Test Discovery & Execution
unittest: Requires manually calling
unittest.main()or usingpython -m unittest discoverfor test discovery.pytest: Automatically discovers tests in files prefixed with
test_and can run them usingpytestfrom the command line.
3. Fixtures & Setup/Teardown
unittest: Uses
setUp()andtearDown()methods for test preparation and cleanup within classes.pytest: Provides a powerful fixture system that allows reusability, parameterization, and better scope control (e.g., function-level, class-level, module-level fixtures).
4. Mocking Support
unittest: Includes
unittest.mockfor creating mocks and patches.pytest: Supports
unittest.mockand also providespytest-mockfor a more seamless experience.
5. Plugins & Extensibility
unittest: Limited built-in extensions. Requires external tools for additional functionality.
pytest: Highly extensible with plugins like
pytest-cov(coverage),pytest-mock(mocking), andpytest-spark(PySpark testing).
6. Parameterization
unittest: Requires using
unittest.subTest()for running tests with multiple inputs.pytest: Provides
@pytest.mark.parametrize, making parameterized testing easier and more readable.
I chose pytest for our case as it is often preferred due to its fixture support, better readability, and extensibility.
Converting Databricks Notebooks into Python Modules
In my repository, the pipelines/modules directory contains Databricks notebooks and Python modules that serve as collections of ingestion and processing functions. These notebooks or modules are not standalone scripts; rather, they support ingestion or processing workflows (jobs). Therefore, it is essential to structure them as reusable Python functions that can be imported and executed when needed.
A Python module is a .py file containing a set of related functions in our repository, typically grouped either by function type or data source.:
To write unit tests, the code must reside in a Python module. If your code is currently in a Databricks notebook or another format, you need to convert it into a Python module.
Steps to Convert a Databricks Notebook:
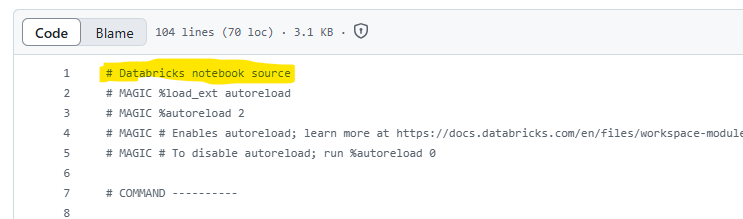
Databricks notebooks are saved as
.pyfiles and contain# Databricks notebook sourceheaders when viewed in a file editor.To convert a notebook into a module:
Create a new Python file and copy the code from the notebook.
Remove all
# Databricks notebook sourceand# COMMAND ----------markers, as these define notebook cells.
If the Databricks notebook uses dbutils, which is available by default in a Databricks notebook environment, you will need to refactor the code. This is because dbutils is not available in a standard Python module. I will explain how to replace it in this post.
Additionally, a Spark session is automatically available in a Databricks notebook, so there’s no need to import it there. However, when I move the code into a Python module, it won’t have access to Spark by default. If the code references spark, I must explicitly import the SparkSession:
from pyspark.sql import SparkSession
Making Modules Importable in the Repository
Another important consideration when writing unit tests is ensuring that the directory containing my Python modules is recognized as a Python package. To do this, each directory (and subdirectory) in my file hierarchy must contain an __init__.py file. This file can be empty but is required for Python to recognize the directory as a package.
For example, in my case, the __init__.py files are located in the pipelines/modules directory and in pipelines/, making both pipelines and modules valid Python packages. This structure allows me to import these directories in my test files and reference the functions within the modules.
Setting Up a Virtual Environment for Pytest
To develop and run unit tests locally, you need a virtual environment:
Clone the repository and navigate to the root directory.
Create a virtual environment:
python -m venv venvActivate the virtual environment:
Mac/Linux:
source venv/bin/activateWindows:
venv\Scripts\activate
4. Install dependencies: pip install -r tests/requirements.txt
5. Run tests: pytest
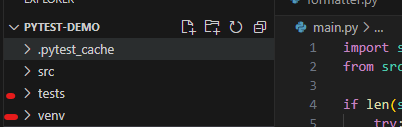
Organizing Test Files
Pytest automatically detects test files based on naming conventions. Our convention:
Test directory:
tests/Test file format:
test_module_<module_name>.pyExample: For
google_sheet_processing.py, the test file istests/google_sheet_processing.py.
The first step is to add a requirements.txt file. This file is not necessarily used while developing on your local machine but is executed during the Continuous Integration (CI) process. When unit tests run in CI, the dependencies listed in requirements.txt will be downloaded and installed on the GitHub Runner machine.
While developing, you should install any required libraries into your virtual environment using pip install. As soon as you install a library, immediately add it to the requirements.txt file to ensure it’s included—starting with pytest.
It’s best practice to pin the version of each library you use to maintain compatibility and prevent unexpected issues. However, in some cases, certain libraries may have version conflicts. In such cases, you can omit the version numbers, allowing CI to resolve and install mutually compatible versions automatically.

Writing Pytest Cases
Create your test file inside the tests/ directory, following the naming convention: test_module_module_name.py. For example, if you have a module named google_sheet_processing.py, the corresponding test file should be named tests/google_sheet_processing.py.
The first step in your test file is to import the module you are writing unit tests for. For example:
from pipelines.modules.google_sheet_processing import *
In most cases, you’ll use import * because you'll need to test all functions within the module. Additionally, this approach ensures you have access to the libraries used in the module, unless you prefer to import them separately in the test file.
The CI coverage script I added requires at least one unit test per function. But you should write unit tests as many as possible to cover all functionalities of the function.
Pytest commands
Pytest provides several CLI (Command Line Interface) commands to run and manage tests efficiently. Below are some of the most commonly used commands:
Run all tests in a directory (default is
tests/)pytestRun a specific test file
pytest test_file.pyRun a specific test function within a file
pytest test_file.py::test_functionShow detailed output (verbose mode)
pytest -vStop after the first failure
pytest -xRun tests matching a keyword
pytest -k "keyword"Run tests with a specific marker
pytest -m marker_nameRun tests and generate a coverage report (requires
pytest-cov).More about
pytest-covbelow.pytest --cov=your_package
Pytest fixtures
Pytest fixtures are a powerful feature in the pytest framework used for setting up and tearing down test dependencies. They help in creating reusable test setup logic, making test code cleaner and more maintainable.
Key Features of Fixtures:
Reusability — Fixtures can be shared across multiple test functions.
Scope Control — Fixtures can have different scopes (
function,class,module,session), defining how often they are executed.Automatic Setup & Teardown — They handle pre-test setup and optional post-test cleanup.
Dependency Injection — Tests can request fixtures simply by including them as function arguments.
For example, test_module_google_sheet_processing.py has several fixtures to mock google client, google sheets and a Spark DataFrame. They are used in in the test cases many times. You define them once, and reuse in multiple places, if necessary with patches.
@pytest.fixture
def mock_google_client():
    """Fixture to provide a mock gspread client instance."""
    return MagicMock(spec=gs.client.Client)


@pytest.fixture
def mock_google_sheet():
    """Fixture to provide a mock Google Sheet instance."""
    return MagicMock()


@pytest.fixture
def mock_df():
    """Fixture to provide a mocked Spark DataFrame that supports all test cases."""
    mock_spark_df = MagicMock(spec=DataFrame)

    # Mock the Pandas conversion (for other test cases using toPandas)
    mock_spark_df.toPandas.return_value = pd.DataFrame(
        {"column1": ["value1", "value2"], "column2": ["value3", "value4"]}
    )

    # Define schema with different column types (for clean_df_to_write_gsheet tests)
    mock_spark_df.dtypes = [
        ("decimal_col", "decimal"),
        ("int_col", "int"),
        ("float_col", "float"),
        ("double_col", "double"),
        ("timestamp_col", "timestamp"),
        ("string_col", "string"),
    ]

    # Mock schema access
    mock_spark_df.schema = {
        "decimal_col": StructField("decimal_col", DoubleType(), True),
        "int_col": StructField("int_col", IntegerType(), True),
        "float_col": StructField("float_col", DoubleType(), True),
        "double_col": StructField("double_col", DoubleType(), True),
        "timestamp_col": StructField("timestamp_col", TimestampType(), True),
        "string_col": StructField("string_col", StringType(), True),
    }
Additionally, there are common fixtures used across multiple test files. Instead of repeatedly declaring them in each test file, I define them once in tests/conftest.py, making them automatically available in all test files within the tests directory. For example, the mock_spark, mock_secret_manager, and mock_sftp_client fixtures are stored in conftest.py under the common fixtures.
@pytest.fixture(scope="session")
def mock_spark():
    """Fixture to provide a mocked SparkSession."""
    mock = MagicMock(spec=SparkSession)
    return mock


@pytest.fixture(scope="session")
def mock_secret_manager():
    """Fixture to provide a mocked SecretsManager."""
    mock = MagicMock()
    mock.get_secret.return_value = "mocked_secret_value"
    mock.secrets.list.return_value = ["key1", "key2", "key3"]
    return mock


@pytest.fixture
def mock_sftp_client():
    """Fixture to provide a mocked SFTP client."""
    mock = Mock(spec=paramiko.SFTPClient)
    return mock
In pytest, fixtures can have different scopes that determine how often they are set up and torn down. The available scopes are function, class, module, and session.
Function scope (default): The fixture runs once per test function.
Class scope: The fixture runs once per test class, shared across all methods in the class.
Module scope: The fixture runs once per module, shared across all test functions in the module.
Session scope: The fixture runs once per test session, shared across all tests in all modules.
Using broader scopes like module or session can improve performance when expensive setup operations (e.g., database connections or Spark connection) are required. However, function-scoped fixtures provide better test isolation, reducing side effects between tests. The choice depends on the trade-off between efficiency and test independence.
About patching
In pytest, patch (from unittest.mock) is used to replace dependencies or objects in tests with mock versions, allowing you to control their behavior and isolate the unit under test. This is useful for testing functions that interact with external services, databases, or APIs. You can apply patch as a decorator (@patch) or use it as a context manager (with patch(...)). When used, it replaces the target object within the specified scope and restores it after execution, ensuring tests run in a controlled environment without modifying real dependencies.
Why patch is useful here:
Prevents real API calls: Ensures the test runs quickly and doesn’t depend on an actual Google Sheets API.
Controls return values: Allows us to simulate different conditions (e.g., empty sheet) without modifying the real function.
Isolates the test: Focuses only on the logic of handling empty sheets rather than external dependencies.
In summary, patch is crucial for mocking dependencies, ensuring predictable test outcomes, and preventing tests from being affected by real external services.
Handling dbutils in Python Modules
Databricks provides dbutils natively in notebooks, but it is not available in standalone Python modules. To make the code testable and executable outside Databricks, I must refactor functions that depend on dbutils. (Refer to my documentation on substituting dbutils usage.)
If I need to use dbutils in a Python module, I can create a custom class that takes dbutils as a parameter during initialization. Then, I will implement my code logic within the class methods. This approach allows me to use the function in a Python module without directly calling dbutils. Instead, dbutils will be passed as a parameter during execution in a Databricks notebook, where it is available.
For example, the secrets_manager.py file demonstrates how to refactor code to replace dbutils.secrets usage in a Databricks notebook.
In a Databricks notebook, SparkSession is readily available, but when running the code as a standalone module, I must explicitly import it:
from pyspark.sql import SparkSession
This ensures Spark operations work correctly in a Python script.
Using Spark for Testing via Databricks Connect
Some Spark functions cannot be fully tested using pytest and mock_spark due to their limitations in simulating the true behavior of Spark methods. In such cases, we can use Spark Connect.
Steps to Set Up Spark Connect for Testing:
Install Databricks Connect in your virtual environment:
pip install databricks-connectAdd
databricks-connectto your test dependencies by including it intests/requirements.txt.Configure the
.databrickscfgfile (if not already set up). This file should be located in the root of your user directory and must contain your Databricks host address, access token, and environment profiles (default, dev, and prod and any other environment you have).
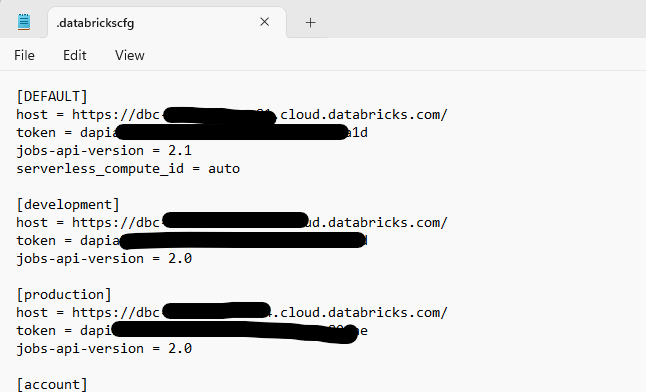
These credentials are used to authenticate into Databricks when connecting to a serverless cluster. You can also use an all-purpose cluster, but there are some key differences:
If the all-purpose cluster is an always-on cluster, there is no difference between using it and a serverless cluster.
If the all-purpose cluster is NOT always on, you will have to wait 4–5 minutes for it to start every time you run your tests. This is not ideal, especially when running tests in CI/CD pipelines.
For efficiency and seamless execution, serverless clusters are the best option — whether you’re running tests in your local IDE or in a CI environment.
Setting Up a Pytest Fixture for Spark Connection
Since the Spark connection is required across multiple test cases in different files, we define a Pytest fixture in tests/conftest.py.
Importing DatabricksSession
First, import DatabricksSession from databricks.connect:
from databricks.connect import DatabricksSession
Note: It is named DatabricksSession rather than SparkSession.
Additionally, we import SparkSession separately for the mock_spark fixture:
from pyspark.sql import SparkSession
This ensures that both the Databricks session for real Spark execution and the mocked Spark session for unit testing are available where needed.
@pytest.fixture(scope="session")
def databricks_spark():
    """Fixture to provide a real SparkSession using Databricks Connect in CI/CD with Serverless enabled."""

    # Detect if running in GitHub Actions (GITHUB_ACTIONS env var is automatically set)
    is_ci = os.getenv("GITHUB_ACTIONS") == "true"

    if is_ci:
        # Running in CI/CD → Use environment variables
        required_env_vars = ["DATABRICKS_HOST", "DATABRICKS_TOKEN", "DATABRICKS_HTTP_PATH"]
        for var in required_env_vars:
            if not os.getenv(var):
                raise ValueError(f"❌ Missing required environment variable: {var}")

        print("Using GitHub Actions environment variables for Databricks SparkSession.")

        # Enable Serverless Mode
        return DatabricksSession.builder.serverless().getOrCreate()

    # Running locally → Use local machine environment variable: set  "DATABRICKS_HOST", "DATABRICKS_TOKEN", "DATABRICKS_HTTP_PATH" env vars in your local machine environment
    print(
        "Running locally: Using local machine environmental variables for Databricks SparkSession."
    )
    return DatabricksSession.builder.serverless().getOrCreate()
Running Tests with DatabricksSession
To run tests that use DatabricksSession, you only need the following command:
DatabricksSession.builder.serverless().getOrCreate()
The serverless() function ensures that a Databricks Serverless cluster is created for the session.
Authentication in CI/CD
In a CI/CD job, the test framework retrieves environment variables set up in GitHub Secrets:
DATABRICKS_HOSTDATABRICKS_TOKENDATABRICKS_HTTP_PATH
These credentials authenticate the connection to Databricks and allow the test suite to interact with a Databricks Serverless cluster.
Setting Up Environment Variables Locally
You can also configure these environment variables on your local machine instead of using a .databrickscfg file.
Steps to Set Up Environment Variables:
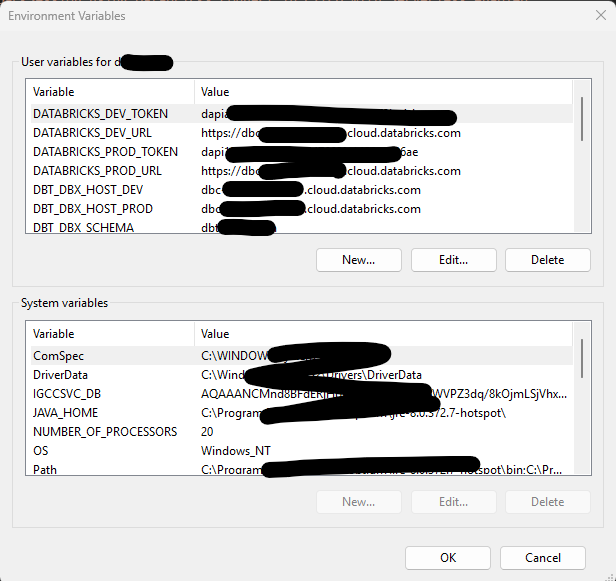
Search for “Environment Variables” in your system’s search bar.
Under “User variables for
<your_username>", click "New" (or edit existing ones).Add the following variables with the correct values:
DATABRICKS_HOSTDATABRICKS_TOKENDATABRICKS_HTTP_PATH
This method allows you to use environment variables both locally and in CI/CD, ensuring a smooth authentication process. Make sure that you user environment variable names match the environment variable names in Github. For example, mine does not match since I have set them up for other purpose earlier, I went ahead with usi
Adding Unit Tests to CI/CD
Unit tests are executed automatically in our GitHub Actions workflow. I added a UnitTests job in .github/workflows/unit-tests.yml. This workflow runs separately from the other workflows if you have (for example, infrastructure workflow) in ci-cd.yml.
name: Unit Tests

on:
  pull_request:
    branches:
      - dev
    paths:
      - pipelines/modules/**
      - tests/**
      - .github/workflows/unit-tests.yml

jobs:
  UnitTests:
    name: Unit Tests
    runs-on: ubuntu-latest
    timeout-minutes: 5
    env:
      DATABRICKS_HOST: ${{ secrets.DATABRICKS_HOST_DEV }}
      DATABRICKS_TOKEN: ${{ secrets.DATABRICKS_TOKEN}}
      DATABRICKS_HTTP_PATH: ${{ secrets.DATABRICKS_WAREHOUSE_HTTP_PATH }}
      DATABRICKS_SERVERLESS_COMPUTE: "auto"

    steps:
      - name: Checkout
        uses: actions/checkout@v4
        with:
          fetch-depth: 0  # Fetch full history so git diff works

      - name: Set up Python 3.10
        uses: actions/setup-python@v5
        with:
          python-version: "3.10"

      - name: Install dependencies
        run: |
          pip install -r tests/requirements.txt

      - name: Run unit tests
        run: |
          pytest -v

      - name: Check for missing unit tests
        run: |
          chmod +x .github/scripts/check_missing_tests.sh
          .github/scripts/check_missing_tests.sh

      - name: Run tests with coverage
        run: |
          COVERAGE_THRESHOLD=0  # Set to 0 to disable failure enforcement
          pytest --cov=pipelines/modules --cov-report=term-missing --cov-fail-under=$COVERAGE_THRESHOLD
A custom shell script (.github/scripts/check_missing_tests.sh) ensures that:
Every module has a corresponding test file.
Every function in a module has at least one test. If missing tests are detected, CI fails and logs the missing cases.

Using pytest-cov for Coverage Analysis
pytest-cov is a plugin for pytest that measures test coverage, showing which lines of code were executed during a test run. It helps identify untested code paths, missed branches in conditionals (if/else), and overall code coverage percentage. This ensures that not only are tests present, but they also execute all critical parts of the codebase, reducing the risk of untested logic in production.
Steps Taken to Integrate Test Coverage in CI
To ensure both test presence and effective coverage tracking, I implemented the following:
Custom Shell Script in GitHub Workflow
This script scans the codebase and verifies that each function and module has at least one unit test.
If a function/module lacks a test, the CI job fails, prompting the developer to add a test.
Additionally, it compares the feature branch’s test coverage to the latest
devbranch, detecting any coverage regression before merging.
2. pytest-cov for Detailed Line & Branch Coverage
Integrated
pytest-covto measure actual test execution at a granular level.The tool generates line-by-line reports showing which lines of code were executed during tests and which were missed.
It ensures that all branches (
if/elseconditions) are covered, catching edge cases and untested logic.Developers can generate a coverage report to visually inspect untested parts.
Comparison: Shell Script vs. pytest-cov
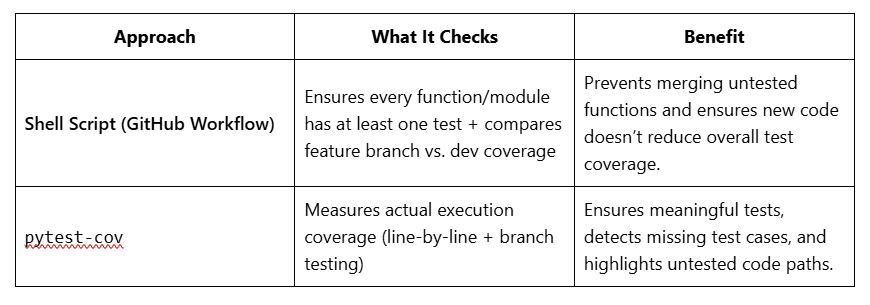
Why Keep Both Approaches?
The shell script enforces a minimum testing standard.
pytest-covensures test effectiveness, preventing untested code paths.Feature branch vs.
devbranch comparison ensures we don’t regress in test coverage over time.
By using both, we automate test enforcement, improve test coverage, and maintain high code quality.
Conclusion
Unit testing your data ingestion modules not only enhances the robustness of your data pipelines but also establishes a strong foundation for scalable and maintainable code. By integrating these tests into a CI/CD workflow, you gain the added advantage of automated testing and coverage analysis, ensuring that code quality remains high throughout your development lifecycle. With tools like Pytest, Databricks Connect, and GitHub Actions, you can efficiently build a testing strategy that catches issues early and boosts development confidence. As you implement these practices, you’ll not only improve your project’s stability but also elevate your data engineering processes to a more professional and reliable standard.